This post contains affiliate links (see my disclosure for details). As an Amazon Associate I earn from qualifying purchases.
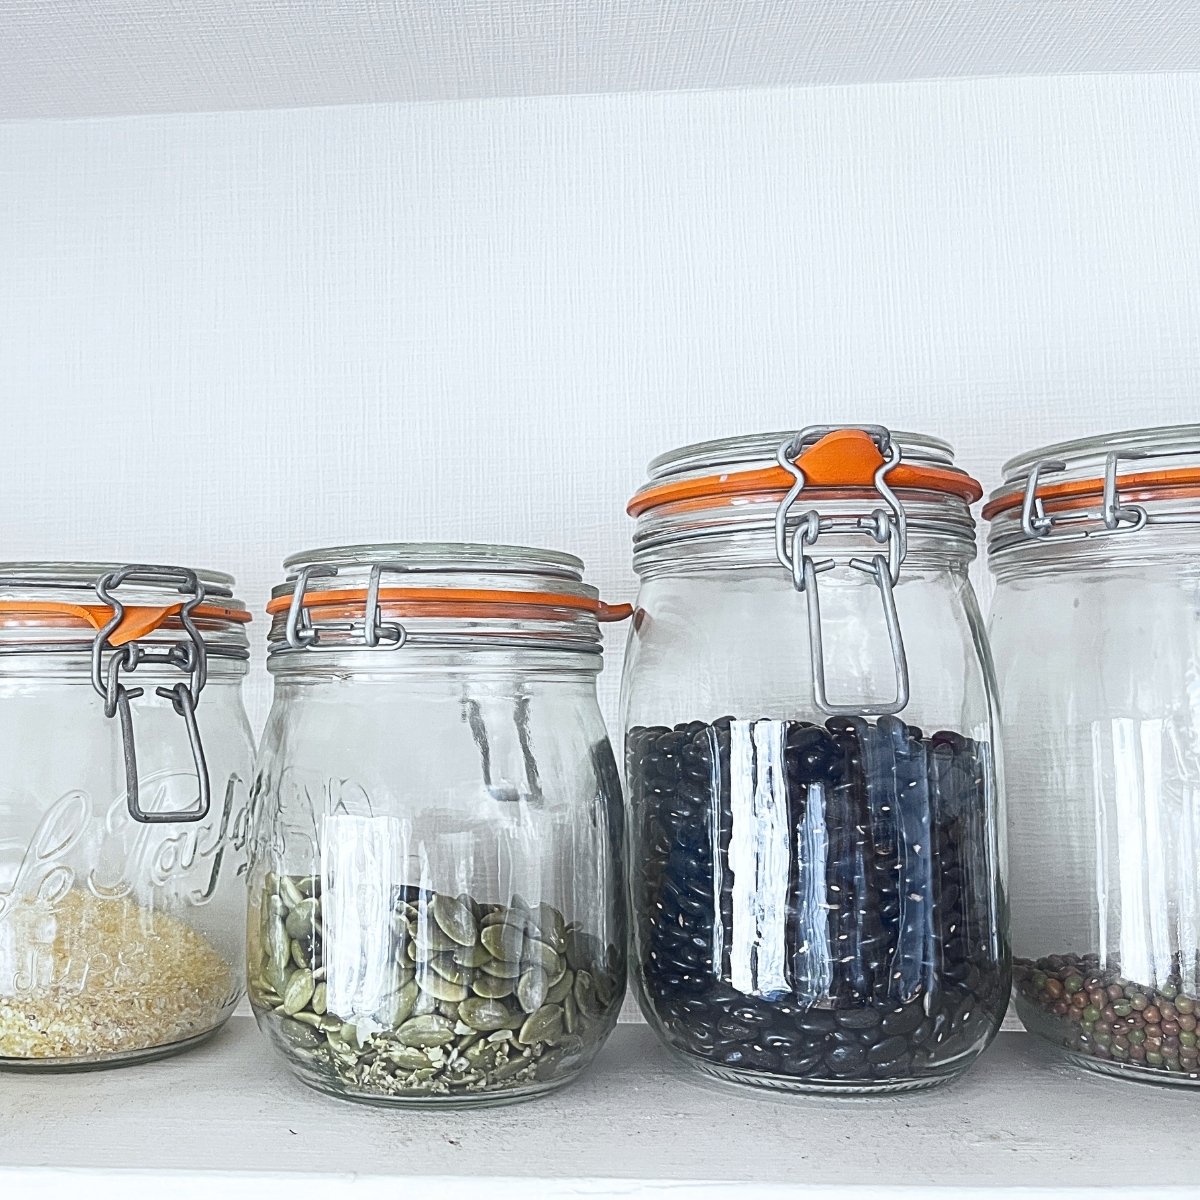
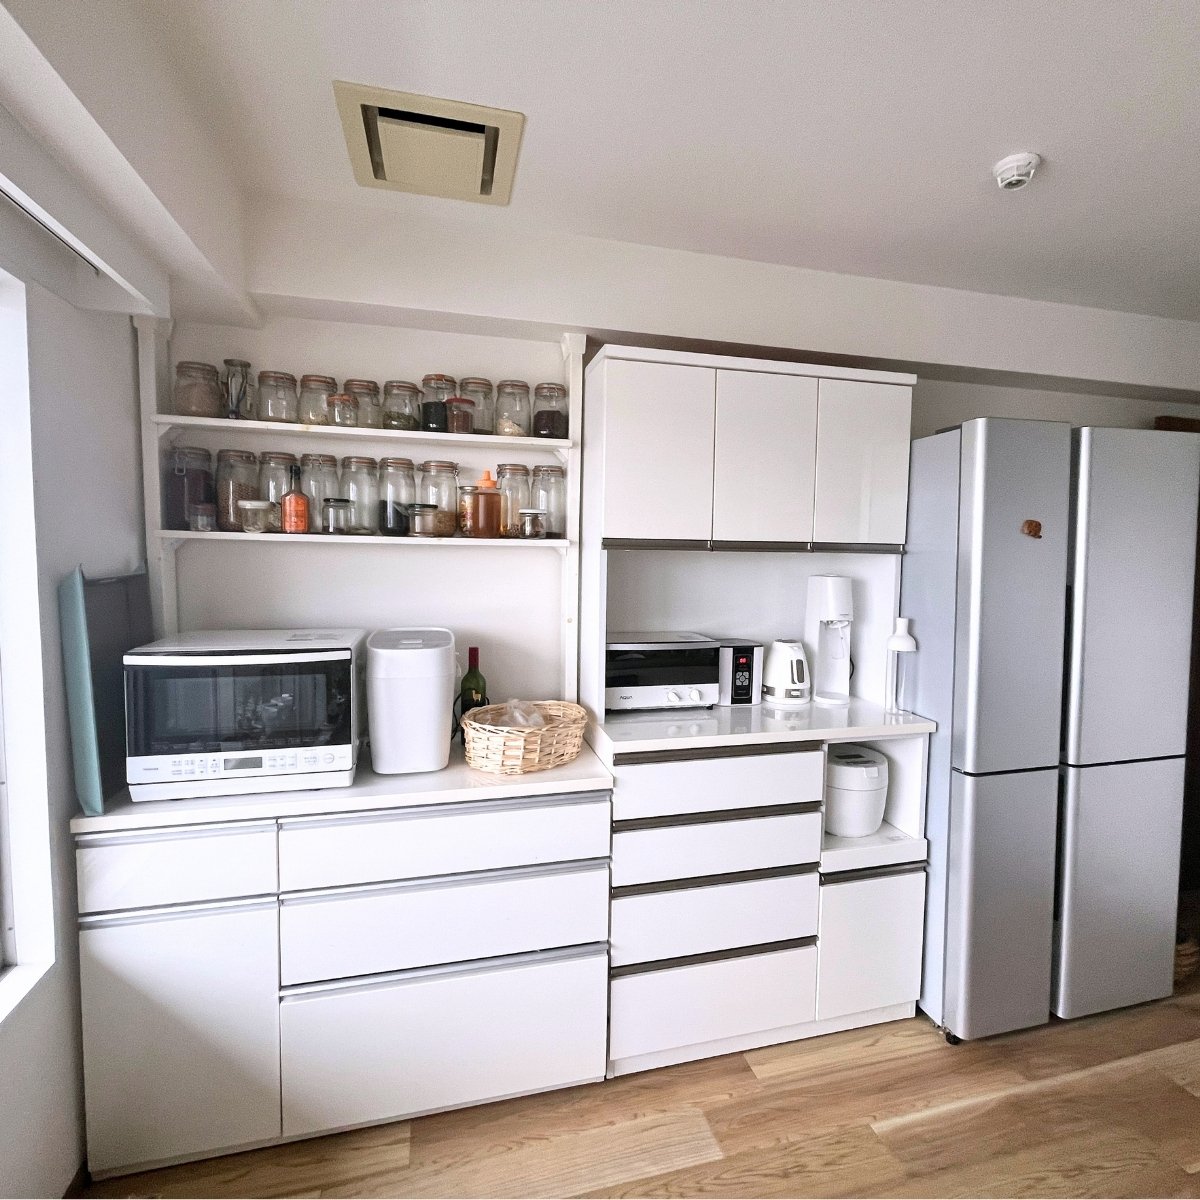
Above the low counter cabinet in our kitchen, there is a shelf made of two wooden posts and two boards, holding rows of glass jars — dried beans, grains, nuts and dried fruit. None of it is screwed into the wall or the ceiling. The posts stay up by pressure.
It was easier to build than I expected, and it turned a stretch of wall that was doing nothing into the most-used storage in the kitchen. This is how it is put together, the measurements, how I decided the shelf heights, and — because it matters — the parts of my setup that don’t follow the manufacturer’s instructions.
An empty wall, not a storage problem
Our kitchen has a tall cupboard with wall cabinets above it, and next to it a lower counter cabinet where the microwave and the bread maker sit. Above the lower cabinet there were no wall cabinets — just bare wall, all the way up to the ceiling.
What started this was that the wall looked wasted. It is the same idea as in the closet storage post: in a small home, the space you are not using is often the easiest space to gain.
But a shelf of jars had been on my mind for a while. At my mother-in-law’s home in France, glass jars of nuts and grains were lined up on a kitchen shelf, and I loved how it looked and wanted to copy it someday. The empty wall was my chance.
How a post stands without screws
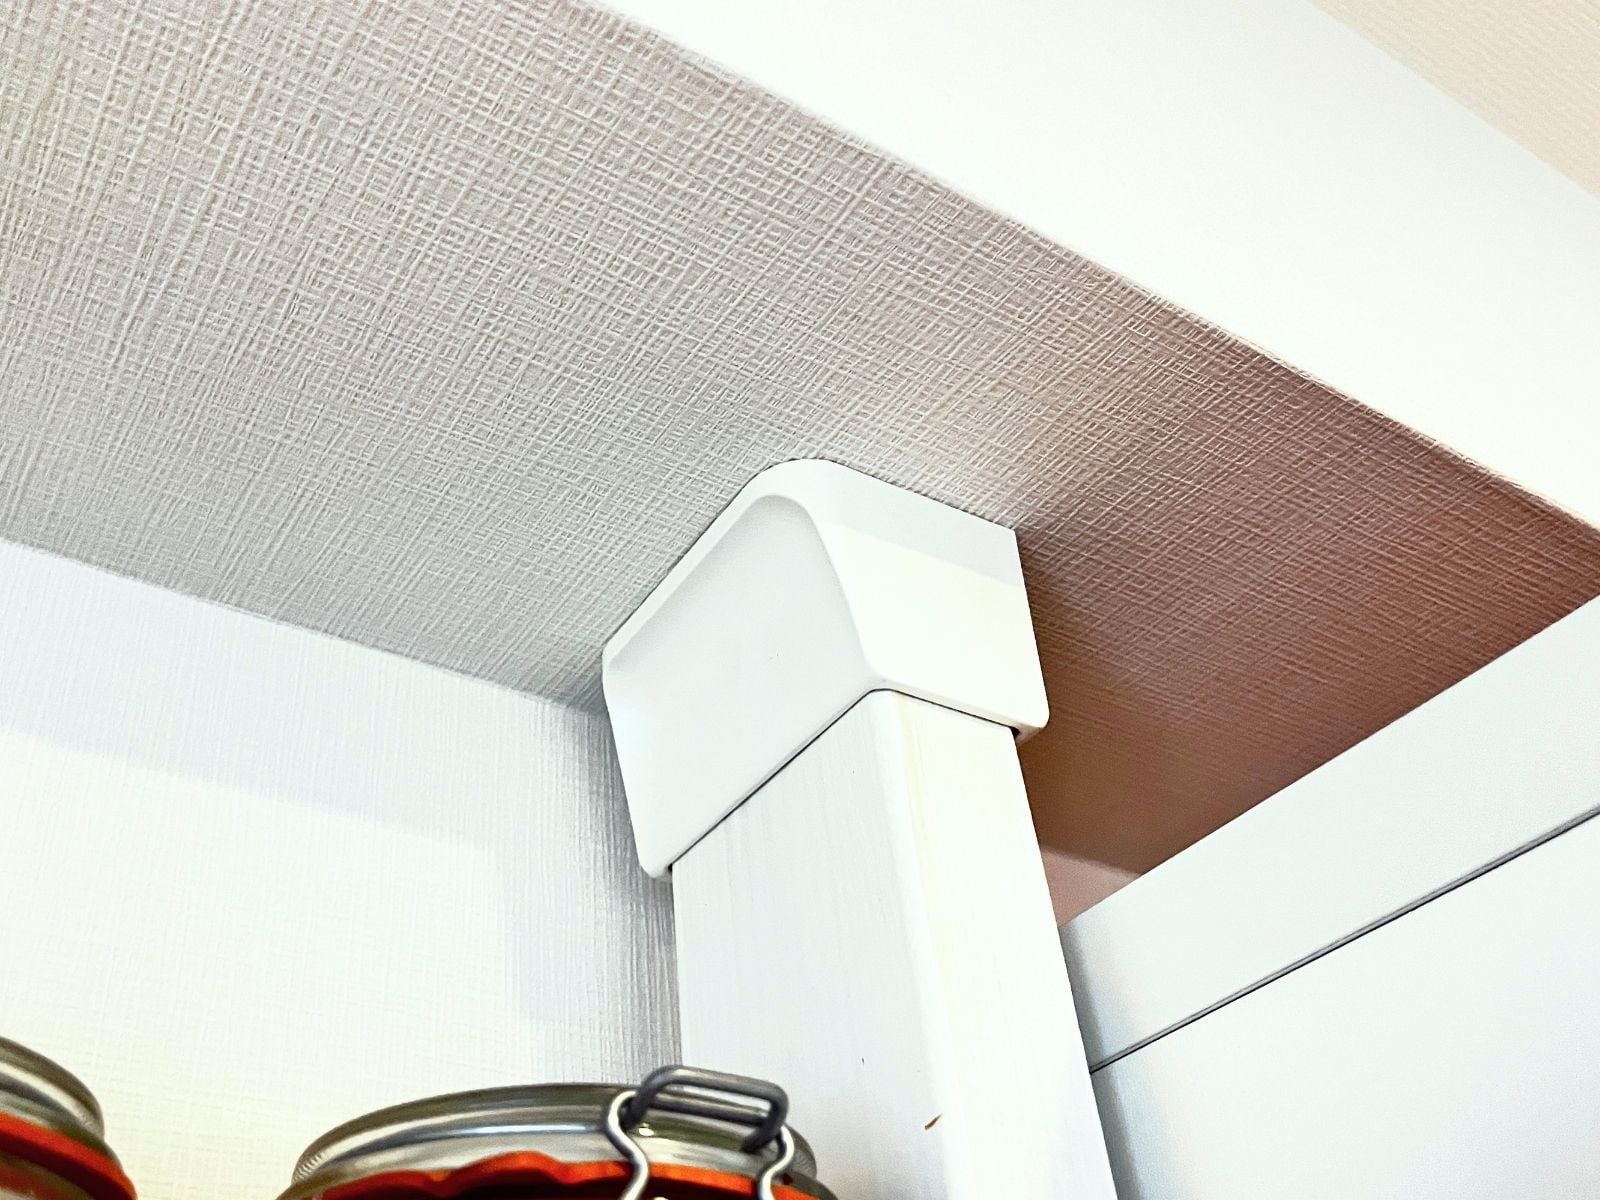
The parts that make this work are usually called tension posts in English. In Japan, a well-known brand is Diawall, made by Wakai Sangyo. You fit a pad onto each end of a length of 2×4 lumber and stand it between the surface below and the ceiling. The top pad has a spring inside, which presses the wood up against the ceiling and holds it there, and the pads have anti-slip sheets underneath, so they grip without screws.
We rent, and the apartment has to go back the way we found it, so not drilling was the starting point for anything we put on the walls.
One thing makes this easy to copy outside Japan: 2×4 lumber (about 38 × 89mm, or 1.5 × 3.5in) is a North American standard size. The pads are the only specialized part. The wood itself is what a home-improvement store sells anyway.
How ours is built
- Two 2×4 posts, painted white, standing on top of the counter cabinet and pressed against the ceiling
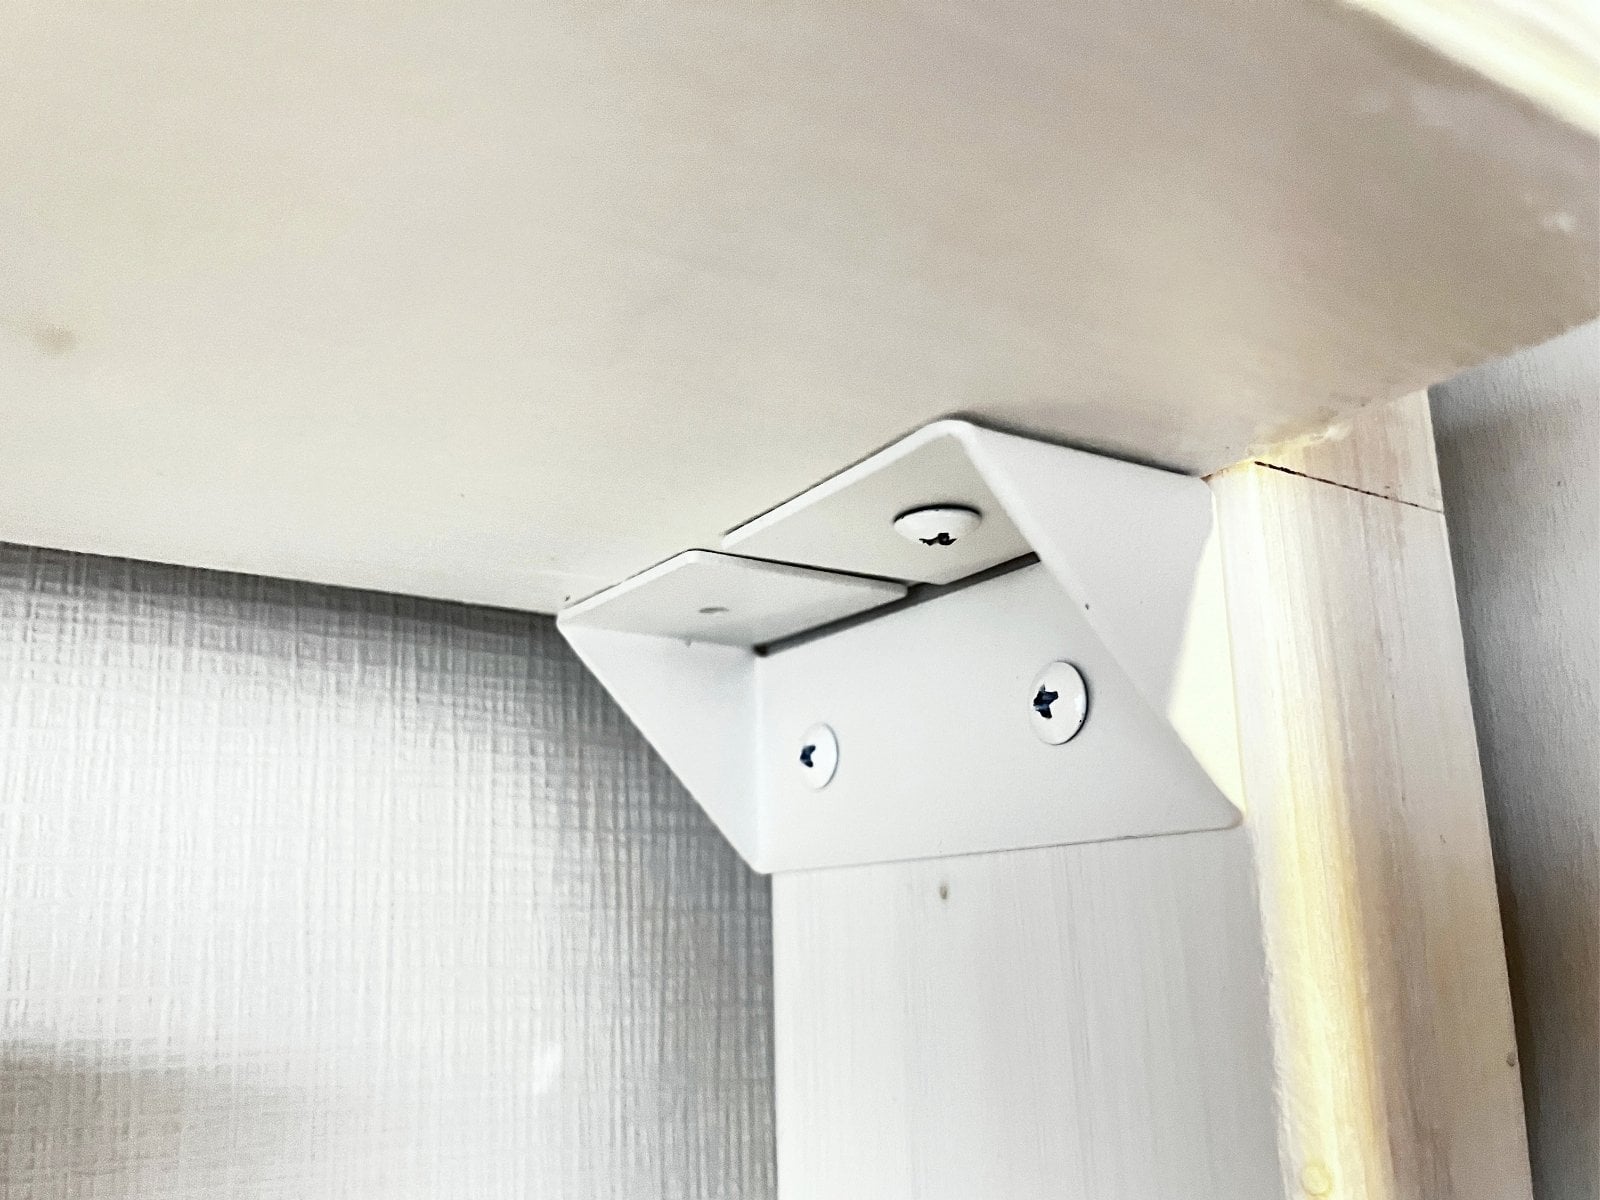
- Two shelf boards, also painted white, resting on metal shelf brackets screwed to the inside faces of the posts
- Glass jars in a single row on each shelf
The ceiling is not the same height at both posts. The left post stands under a ceiling beam, so it is shorter than the right one. Diawall’s instructions are to cut the wood 45mm (about 2in) shorter than the ceiling height — so if there is a beam or a soffit near where your posts will go, measure at each post rather than once for the whole wall.
For the brackets, the store also had cheaper plastic ones. Glass jars full of beans are heavy, so I paid a little more for metal ones rated for more weight.
The measurements (shelf heights are to the top surface of each board):
- Countertop, from the floor: 85cm (33.5in)
- Lower shelf, from the countertop: about 60cm (about 23.5in)
- Upper shelf, from the countertop: about 91cm (about 36in)
- Gap between the shelves: about 30cm (about 12in)
- Shelf width: about 116cm (about 45.5in)
- Shelf depth: about 15cm (about 6in)
How the heights were decided
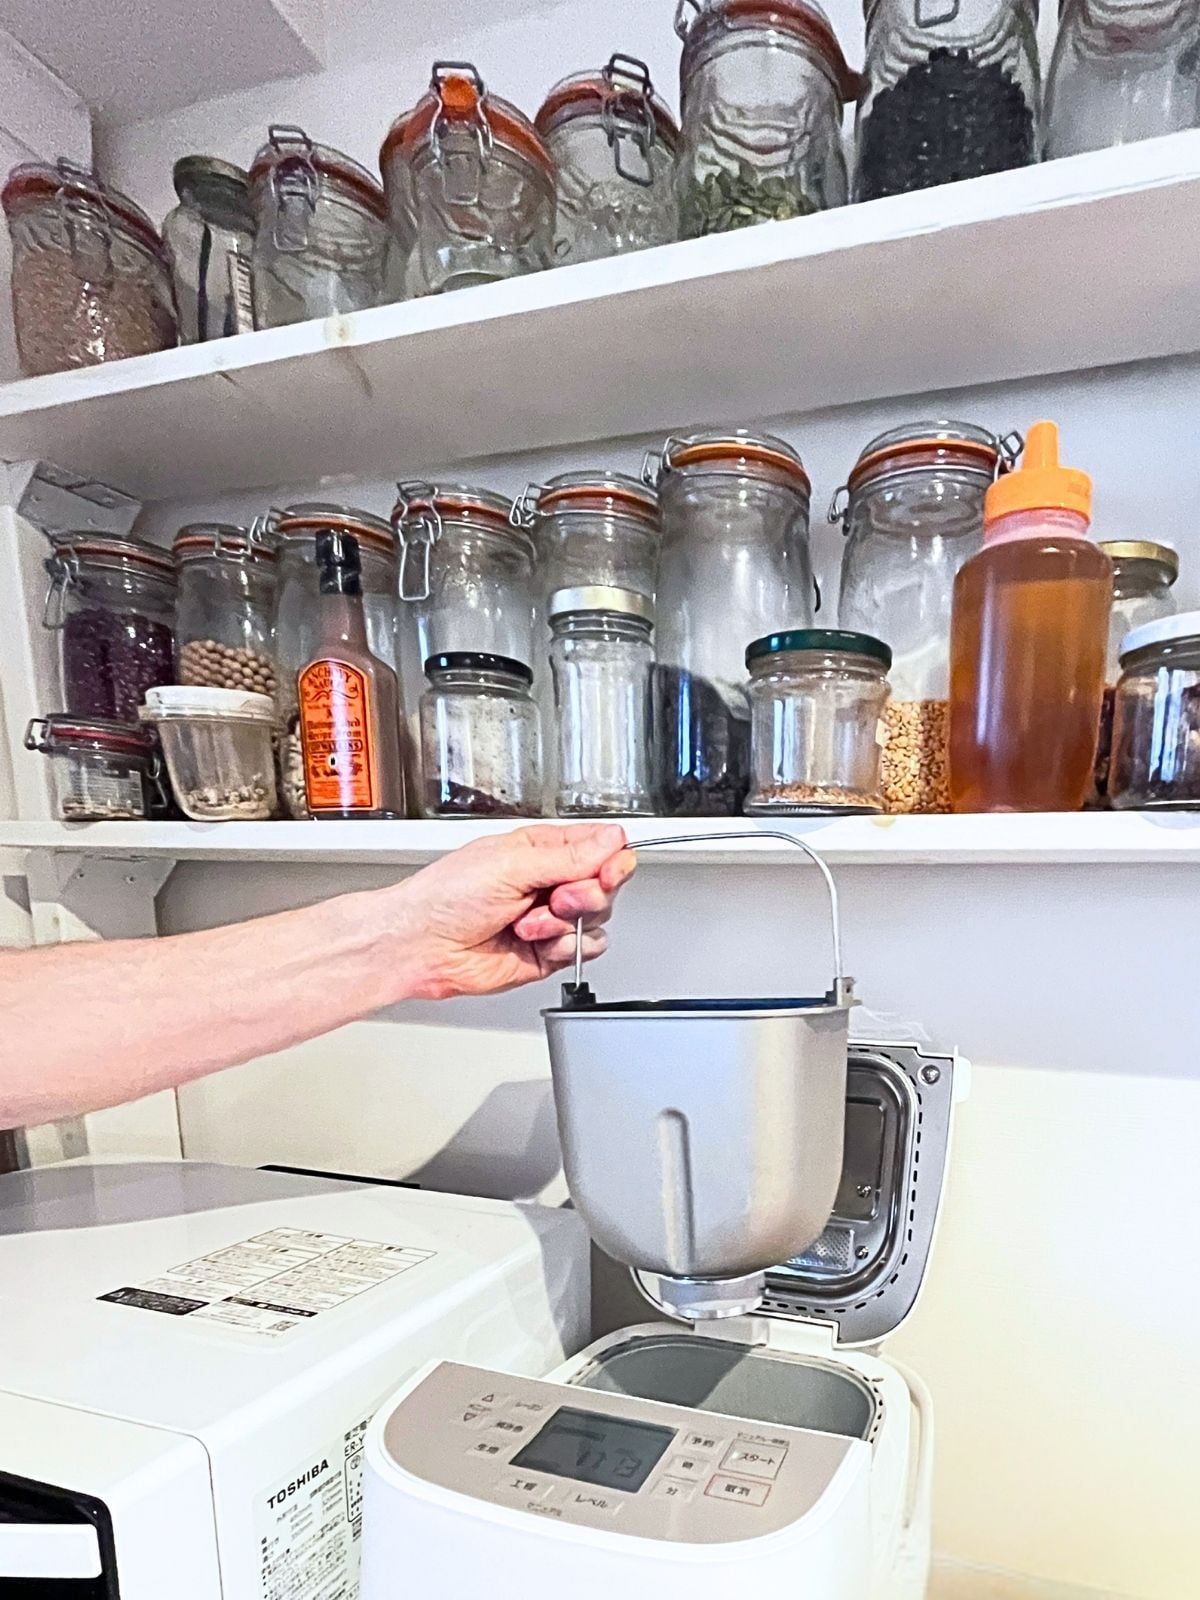
The lower shelf is set by the bread maker’s lid. In our previous apartment, the bread maker sat in the open middle section of a tall cupboard, the kind with shelves above and below. When I opened the lid, it hit the shelf above, so it could not open all the way. Getting the bread pan in and out meant tilting it past the edge every time. So this time I opened the lid fully, added enough room above it to lift the pan straight out, and put the lower shelf there.
The tip I would pass on: measure appliances with the lid open. The height of an appliance with its lid closed tells you very little about the space it needs while you are using it. (I did the same with the lids of our kitchen trash cans.)
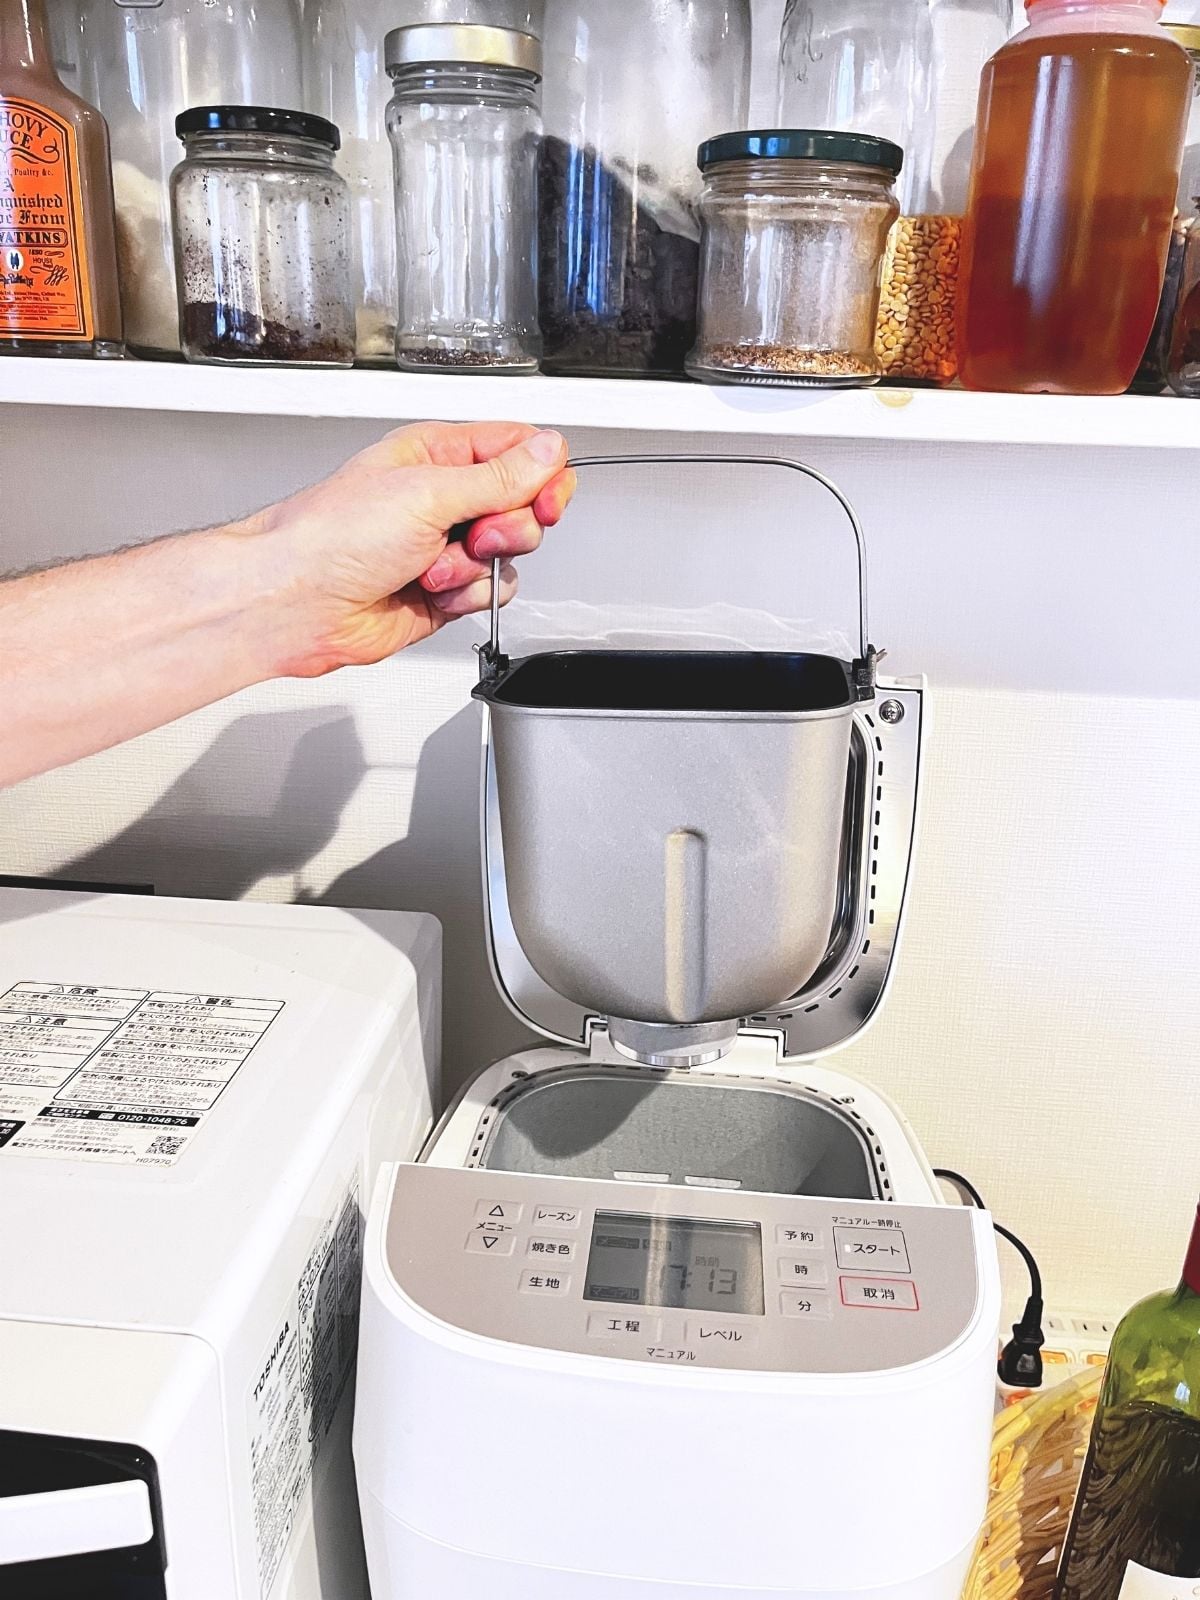
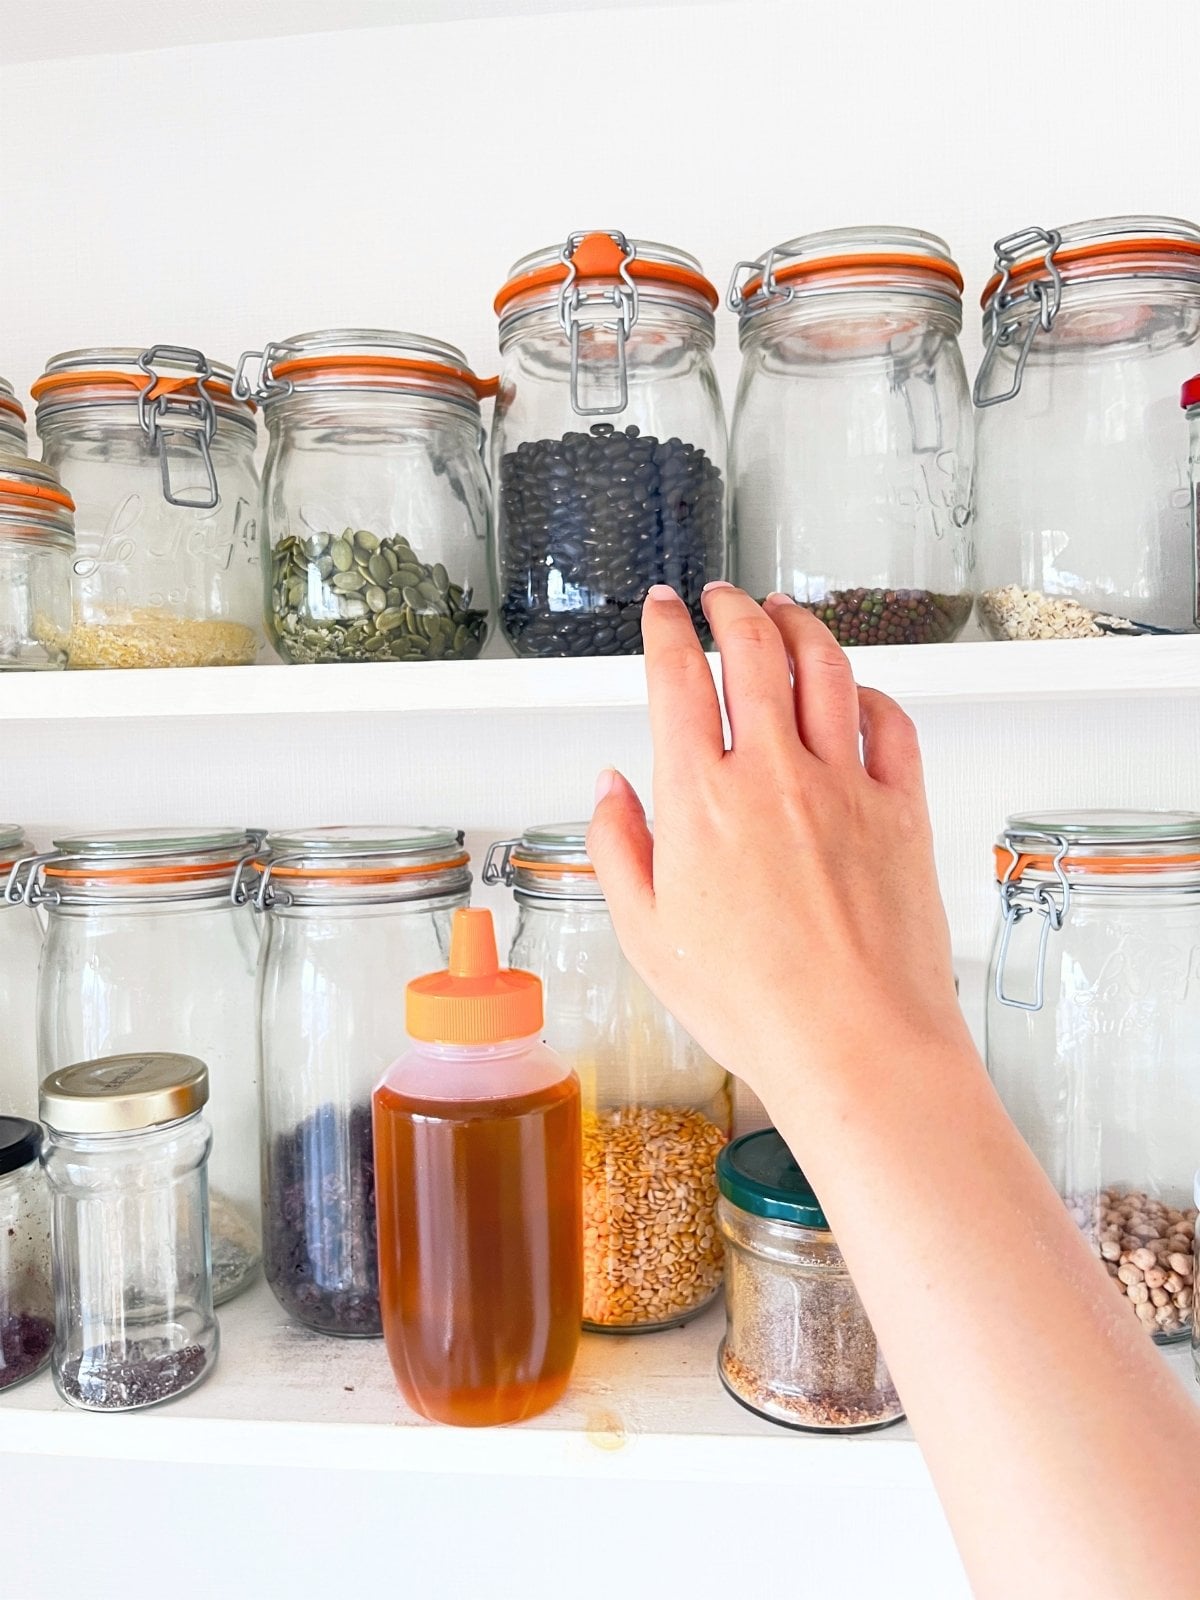
The upper shelf is set by two limits. The gap between the shelves had to fit the tallest jars on the lower shelf, and the upper shelf had to stay within my reach without a step stool. Between those two, the gap came out at about 30cm (about 12in).
One row deep, so nothing hides
The shelves are about 15cm (about 6in) deep — room for one jar and no more. Nothing sits behind anything else, so every jar is in view at once.
That is the main reason the dried goods are in jars at all. In their original bags, it was hard to tell at a glance whether we still had something or had run out. On the shelf, I can see what is there and roughly how much is left, and take it down without moving anything else. It is less about effort than about not having to check.
Most of the jars are Le Parfait, a French brand, and because every jar is in view, I wanted them all to be the same shape.
What actually goes in those jars — and what ends up in the fridge instead — is in this post about dry goods storage.
What to check before you copy this
This shelf has been up for the three or four years we have lived here. Japan has earthquakes, and in that time there have been several I clearly felt. So far, not one jar has come off. That is one household’s experience, though, not a safety test — and parts of my setup do not follow the manufacturer’s guidance, which you should know about.
My posts stand on a cabinet, not on the floor. Diawall’s guidance is to install it where the floor and the ceiling are both level. Standing the posts on top of a piece of furniture is not something the instructions cover.
My shelves stick out a little further than recommended. Diawall recommends keeping shelves within 4cm (about 1.5in) of the front face of the post. If a shelf sticks out further, the maker suggests adding legs to it, or keeping the combined center of gravity of the shelf and its contents within a set range. Mine stick out about 5cm (about 2in). I keep the jars pushed toward the back, but I have not checked that against the maker’s diagram.
Other conditions from Diawall’s FAQ:
- Stand the posts against a wall, not out in the open
- Not on carpet, on a slope, or anywhere with vibration or impact
- Not somewhere very damp or in long hours of direct sunlight
- Do not climb on the posts or put your weight on them
- They are not an anti-tip device for furniture
On weight: Diawall does not publish a single load figure — its FAQ says what it can hold varies a great deal with conditions. Labrico, a similar product, lists a working load of up to 20kg (44lb) per 2×4 post on its Amazon listing. Brackets have their own limits too: Diawall’s own 2×4 shelf brackets are rated at 5kg (about 11lb) per pair. Whatever you use, add up what full glass jars weigh before you load the shelf.
What to buy, and where
The post pads. I used Diawall. It is made for the Japanese market, but listings do appear on Amazon.com, so check stock there first. It is widely sold on Japanese shopping sites, and you can order from those through a proxy service — which service covers which site is in my guide to ordering from Japan.
Labrico, made by Heian Shindo, is the same kind of product and is sold on Amazon.com. I have not used it, so I cannot tell you how it compares in use.
2×4 lumber. From a local home-improvement store. For the length, take the ceiling height at each post and subtract 45mm (about 2in) for Diawall — check the instructions for whichever pads you use.
Shelf brackets. Metal ones, with the load rating listed. Labrico also makes shelf supports designed for its 2×4 posts.
Shelf boards. Also local. Ours are about 15cm (about 6in) deep, and the deeper the board, the further it sits past the front of the post.
The short version
- A bare wall above a low cabinet is space you can use without drilling.
- Tension posts hold 2×4 lumber between the surface below and the ceiling with spring pressure.
- Measure the ceiling height at each post — a beam changes the length.
- Set shelf heights by use: the appliance lid fully open, the tallest jar, and what you can reach.
- Shelves one jar deep mean nothing hides.
- Check the maker’s conditions before copying, especially where the posts stand and how far the shelves stick out.